
Your First AI Avatar in HeyGen
Create one avatar, connect a voice, and render a short video you can review.
Choose one avatar route → voice → render → review.
1. Choose your avatar route
Use the photo route if you want to prepare a portrait using the two prompts. Use the Digital Twin route if you want to start from footage of yourself. You only need one route for your first video.
Route A — Use the two prompts
Start with 3–6 clear reference photos of yourself. Upload them to an image-capable AI tool. First extract an identity description, then use that description with the references to generate the portrait. The description guides consistency; always compare the result with your real photos.
Prompt 1 — Analyze your reference photos
You are a professional visual identity analyst. Analyze the person consistently shown across the uploaded reference photos. Create a detailed Facial Identity Report for future image generation. Focus only on visible, objective traits. Do not guess ethnicity, nationality, age, personality, health, or other sensitive attributes.

Include: Face Shape; Skin; Eyes; Nose; Mouth and Smile; Hair; Facial Hair and Distinctive Features; Camera and Lighting Notes; and 10 Likeliness Anchors.

End with “Portrait Identity Prompt:” followed by one concise, highly specific paragraph describing the person’s facial identity for future image-generation prompts. Do not mention the reference photos, use vague words such as “attractive” or “normal,” or add clothing, setting, or mood unless necessary to preserve identity.
Prompt 2 — Generate your image
Copy the Portrait Identity Prompt from the first result into the indicated section. Change the scene directions to describe the portrait you want.
Create a hyper-realistic, high-resolution photograph of the person described below. Treat the identity details as non-negotiable: preserve the exact face shape, eye shape and color, eyebrow shape, nose, lip proportions, skin tone and natural texture, hairline, hair density, and hair texture. Keep natural anatomy and realistic camera rendering.

Portrait Identity Prompt:
[PASTE THE PORTRAIT IDENTITY PROMPT HERE]

Create this image:
[DESCRIBE ONLY THE NEW SCENE: outfit, hairstyle, pose, expression, camera angle, lighting, and location.]

Use realistic skin detail, natural depth of field, and a photographic lens look. No text, logos, watermark, extra people, distorted hands, beauty-filter skin, or altered facial proportions.
Examples
Facial identity analysis:
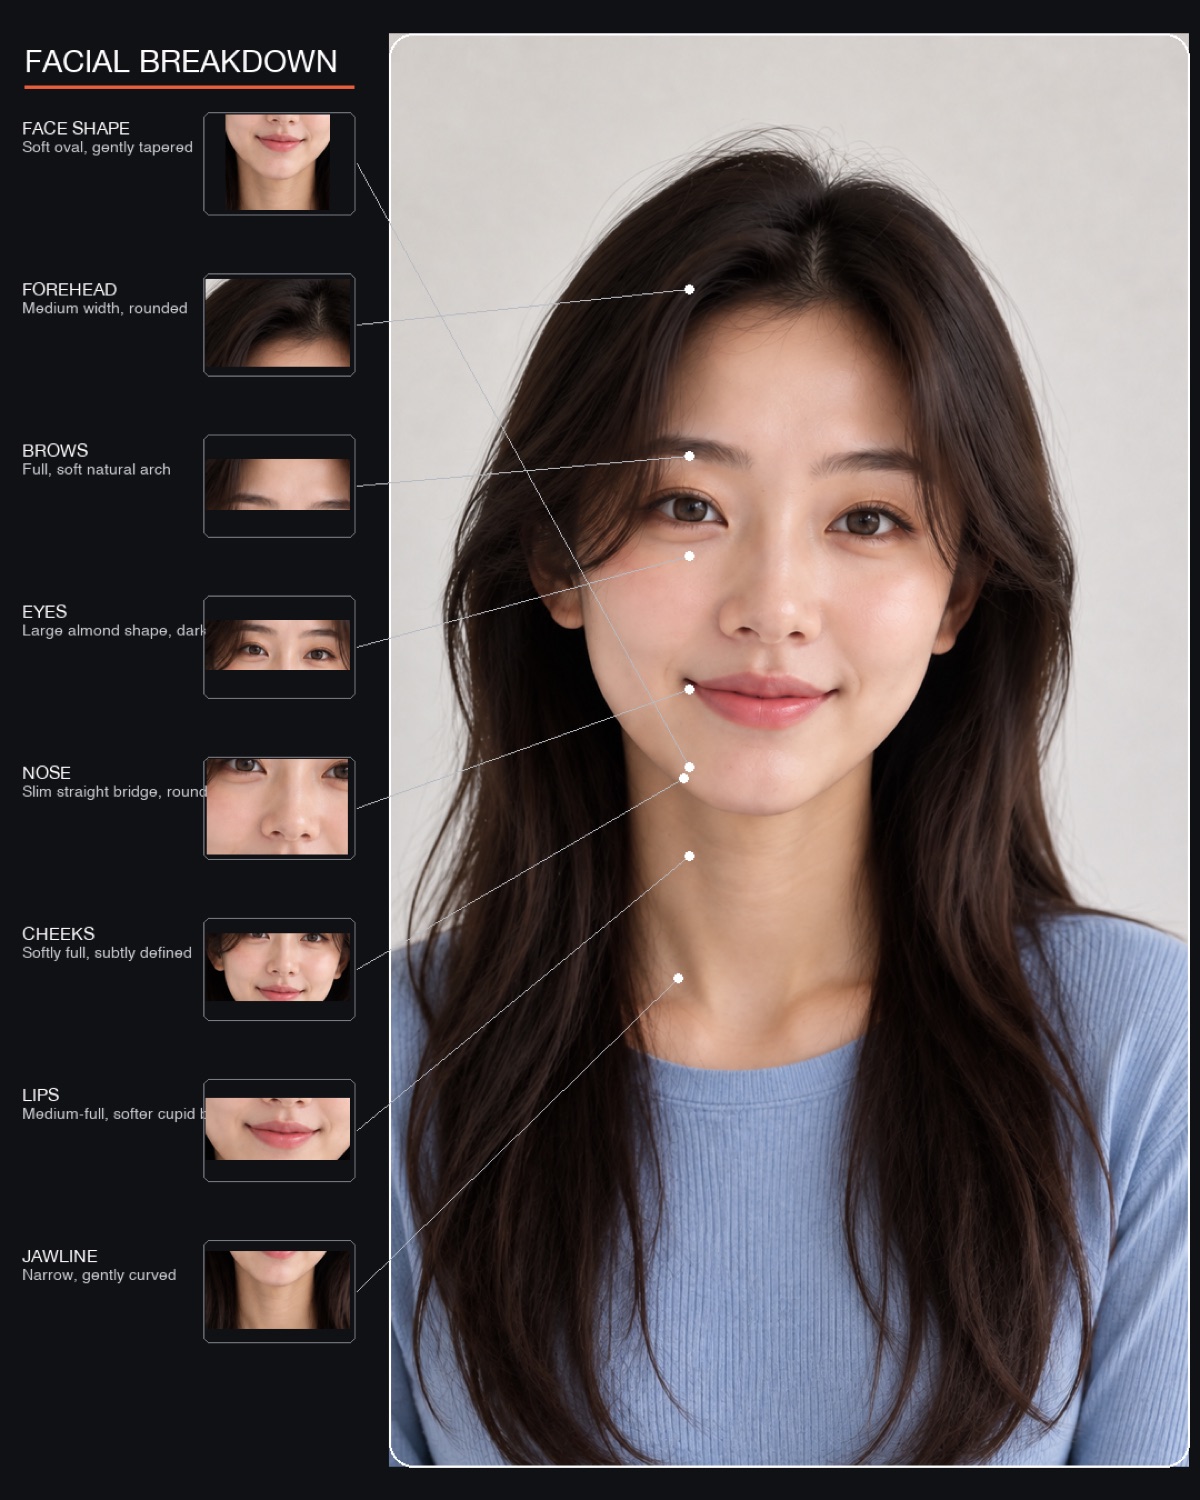
Generated result:

Bring the image into HeyGen
- Check that the portrait still looks like you, with clear eyes and mouth.
- In HeyGen, open Avatars and start a new Photo Avatar using your image.
- Name the avatar and complete the setup prompts.
HeyGen may ask you to select a voice during this setup. Use the voice section below at that point; you do not need to create the avatar again.
Route B — Record your Digital Twin
- Prepare a quiet room, even front lighting, and a camera at eye level.
- Open HeyGen's Avatars area and start the Digital Twin creation flow.
- Review the recording guidance, then upload footage or record with your webcam or phone.
- Speak naturally, keep your face visible, and avoid exaggerated movement.
- Complete the verification steps HeyGen requests and submit your footage.
- Wait for processing and find the result in your avatar library.
2. Set up your voice
- Select the voice associated with your avatar, or choose a voice from HeyGen's library for a first test.
- If using your own clone, complete the voice setup available in your account.
- Preview a short script and listen for pronunciation, accent, pacing, and natural delivery.
- Confirm the selected voice before rendering.
3. Render your first video
- Create a video using your chosen avatar and voice.
- Add a simple script you would actually say on camera. Aim for 30–60 seconds and keep it under 100 words.
- Render the test and watch it once all the way through.
4. Review before making more
- Does the face look recognizably like you?
- Does the voice sound right for the script?
- Do the mouth movements match the words?
- Are the eyes, head movements, and gestures natural?
- Does the framing fit the content you want to publish?
Adjust the relevant input and render another short test before producing longer videos.
- Troubleshooting Likeness is off: Review the source image or footage. For generated portraits, compare against the reference photos and refine the identity description. For a recorded twin, improve the lighting and recording.
Delivery sounds wrong: Preview and adjust the voice and script before another render.
Lip sync or movement feels off: Try a shorter test and check the audio. If the issue persists, revisit the avatar source.
Images lose consistency: Keep the identity description and references consistent, change the scene instructions, and review each output.
Next step
Reuse the avatar and voice for short-form scripts, product explainers, and repeatable formats once the first test works.
Related knowledge
AI avatar map · digital-twins · avatar-production
Sources
See the broader system
How We Built It: 22M Views in 6 Months connects avatar production with brand strategy, Voice DNA, distribution, and the reported client results.
Extend character consistency
The AI Character Reference System covers multi-angle reference sheets, separate style references, and identity checks across images and video.
Want this set up for your business?
We turn these workflows into working marketing and sales systems.